Welcome to intarsys
Signature verification

Sign Live! CC validation server

Sign Live! CC validation server

Server-based signature verification solution

check

Sign Live! CC validation server checks electronic signatures, seals and time stamps in large quantities fully automatically in the background

Signature

Siegel

time stamp

Check signatures, seals and timestamps

Extensive functions

Sign Live! CC validation server

About 0 M.
exams monthly

Multi-tenancy

The Sign Live! CC validation server can process a large number of processes in parallel. A comfortable and intuitive user interface is available for the definition of client-specific test services.

Integration option

Extensive standard interfaces and integration options are available for process integration. Depending on requirements, the connection can be made via directory monitoring, command line calls, programming interfaces (API) such as XMLRPC, SOAP, ActiveX, HTTP, etc. It can also be used in virtual environments. 

Internationalization

The Sign Live! CC validation server can be used internationally, regardless of whether you are operating from Germany, Austria, another EU country or Switzerland.

Extension option LTV

Especially for the long-term archiving of digitally signed documents, it makes sense to store all signature verification information in the signature. Sign Live! During signature verification, CC validation server offers the function of subsequently storing the validation information and also qualified time stamps in the signature information without breaking the signature. This considerably simplifies the checking of signatures, even after long storage periods, or makes it possible in the first place.

It should be possible to check whether a signature is valid, i.e. valid, even after many years. In order to be able to check a signature again, several pieces of information must be available:

  • Was the end user certificate used valid at the time it was used?
  • Was the issuing CA (Certificate Authority) of this certificate trustworthy and the root certificate valid at the time the end user certificate was created?
  • What was the quality level of the certificate used? Basic, advanced or qualified?

To confidently answer these questions, a validation application such as Sign Live! several exams. An important aspect of this check are revocation checks using OCSP (Online Certificate Status Protocol), ie queries to the trust service provider (VDA) that issued the end user certificate used. In order for these OCSP queries to be carried out, this service must be made available online by the VDA (directory service). The replies from the VDA are in turn signed by the latter so that the trustworthiness can be checked and thus ensured. This is then done in turn with the inclusion of OCSP queries. International standards (ETSI) regulate how this is to be done in full. At the end of these queries, the validation application can then provide a trustworthy status of the end user certificate used.

But what if the necessary directory service is temporarily or permanently unavailable? A temporary disruption can occur if the required directory service is simply not available online. Or what if this was switched off by the VDA being discontinued? The central deletion of information after the retention periods have expired also represents a cut. The end user certificate used cannot be checked in such cases and therefore the complete signature check does not lead to a clear result.

LTV signatures are different. With this type of signature, all required information is embedded in the signature, again according to international standards (ETSI). In the case of PDF documents and signatures, this is technically regulated, for example, by the PAdES standard (ETSI EN 319 142) in the context of the PAdES-B-LT profile.

The necessary information can be embedded both during signature creation and later during validation. However, it is rare for the validation information to be embedded during signature creation, as this would slow down the entire process. In addition to the time required to create the signature, the time for validation would also be added. It is therefore a good idea to enrich the LTV data during validation before archiving. From this point on, the signature is always checked offline and takes place without access to the directory service. A test is therefore independent of the availability of this service, regardless of the reason why it is not available.

Does the LTV signature do even more?

How the validity of certificates is checked is based on different models (chain, shell or modified shell model). These different models also make sense for the different uses of certificates. The validity of an SSL certificate should be checked differently in the browser than a certificate that was used to sign documents that have to be verifiable for decades.

Let's take Adobe Reader as an example. Adobe Reader will no longer classify a signature as trustworthy after the end user certificate used has expired, even if the signature was made during the validity period.

This behavior can be avoided by the LTV signature if the LTV signature is done before the expiration date. With the timely LTV signature, the Adobe Reader tick stays green and the signature continues to be positively checked - permanently. This is an important step on the way to greater user acceptance of the signature. 

How to create an LTV signature with Sign Live! CC generated?

Sign Live! CC validation server

The server solution for signature verification

Learn more about Sign Live! CC validation server

FAQs about the Sign Live! CC servers

c Expand all C Fold everything in

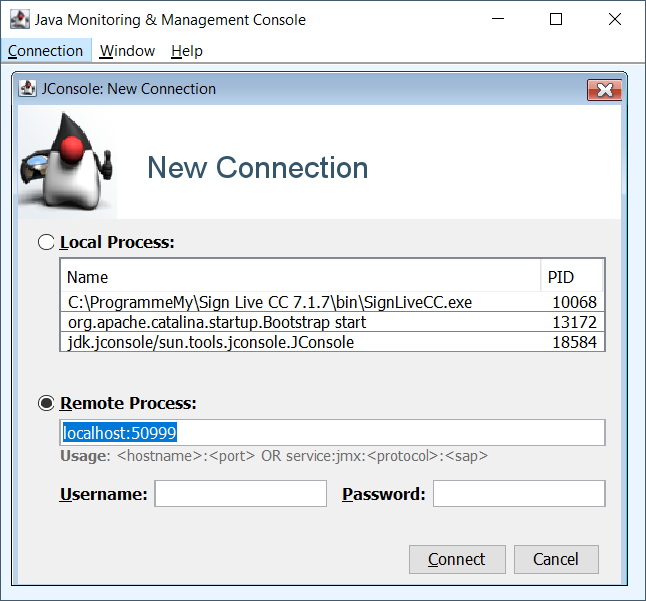
In the following, you will learn how to set up a remote connection to a JVM for as a function test via jconsole.
Security aspects are deliberately not taken into account. For this and more in-depth information, please see the linked information.

  1. Prepare JVM
    Digression for Sign Live! C.C.C/ PDFA Live! /Sign Live! cloud suite bridge:

    A complete JRE is required on the client side (where the intarsys product is operated) to use JMX.
    The above products are delivered with reduced JREs. Therefore, it must first be ensured that the intarsys product starts with a complete JRE.
    You can find information on this in this FAQ Starting SLCC with “my” JVM.

    Configuration of the JVM for remote access
    A port must be defined for remote access to the JVM and, for the sake of simplicity, security mechanisms must be switched off.
    Add the following definitions to your Java configuration (any free port can be used as a port)
    -Dcom.sun.management.jmxremote.port=50999 -Dcom.sun.management.jmxremote.authenticate=false -Dcom.sun.management.jmxremote.ssl=false
    For z. B. Sign Live! C.C.C put this data in the file C:\Program Files\Sign Live CC 7.1.7\bin\SignLiveCC.exe.vmoptions and restart the application.
    Your JVM is now configured for remote access via JMX.
  2. Establish a connection to the JVM with jconsole
    Start the Java tool jconsole on the client.
    You can find it in your Java installation (JDK) e.g. B. in the path C:\Program Files\Java\zulu11.48.21-ca-jdk11.0.11-win_x64\bin\jconsole.exe

    Select the JVM to be monitored via the defined connection data:

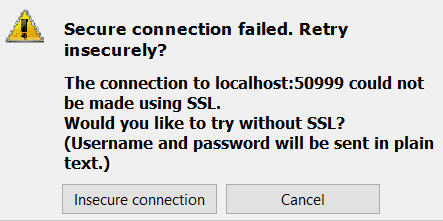
acknowledge the warning

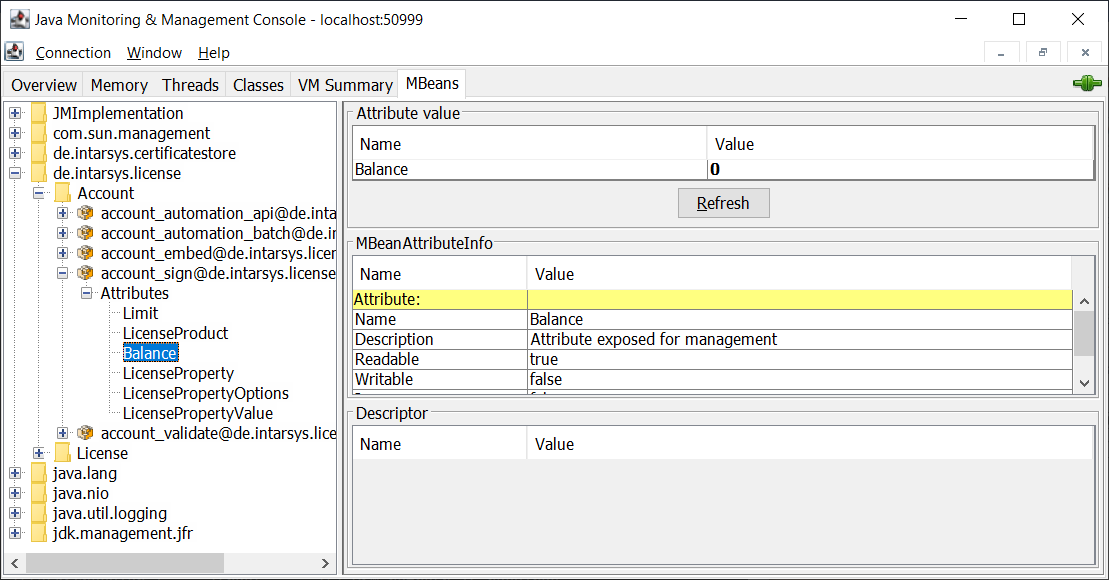
... and you get access to the JVM. After switching to the MBeans tab, read e.g. B. the current license status:

More Information

  1. The version of the client JDK is independent of the one used in the intarsys product.
    It must be a JDK.
  2. When accessing from localhost, there is no need to define a port and switch off security.

More detailed information

  1. https://docs.oracle.com/javase/1.5.0/docs/guide/management/index.html
    therein
  2. https://www.oracle.com/technical-resources/articles/javase/jmx.html

Should several Windows services from Sign Live! C.C.C are operated in parallel, a name must be specified when installing the service. To do this, customize the bin/SignLiveCC_service_install.bat file by specifying a name after the /install option.

For example:

……./install MySLCCService

The same name must be specified in the bat files for starting, stopping and uninstalling the Windows service.

Parameters for use in Sign Live! C.C.C Windows services are passed using the file “bin/SignLiveCC_service.exe.vmoptions”. Further information can be found here.

How to install the software on a Linux system:

  1. Download the file with the extension ".tar.gz".
  2. If you have already installed the application in a previous version or if you are installing a patch:
    • Quit the application if it has started.
    • If you have configured the software as a Linux service, stop the Linux service.
  3. Unzip the downloaded file as follows, using the file name of the downloaded file plus the version number as the name for the installation directory:
    tar -xf signlivecc_*.tar.gz -C /var/signlivecc-7.1.11/
  4. Check your installation.
  5. Start the installed application.

Note: You should also unzip an update into a new directory in order to avoid the contents of different versions in the installation. Specific adjustments must be carried out again or adopted after the installation.

Note: Depending on the product, the file name of the downloaded file will be different. For the example in point 3, the product “Sign Live!” CC” .

Stay up to date with our newsletter!

And get all the information about:

Products

Services

Events

Activities

Qualified electronic signature: ECJ ruling of February 29.02.2024, 25 A current ECJ ruling specifies the interpretation of Article XNUMX of the Regulation (EU)...